Претпостављам да знате за књигу Сесилије Луи али ако је нисте прочитали,
срдачно вам је препоручујем. Књига је намјењена почетницима али и искусним квилерима.
If you haven't read Cecelia Louie's book - I
recommend with all my hart that you do it. The book is written for people with
all levels of quilling skills, from beginners to experienced quillers.
Сесилијине радове познајем од раније. Често одем на њен блог, да видим шта има
ново и да се, по ко зна који пут, дивим њеном вилином коњицу.
I have been following Cecelia 's work for
some time now, often visiting her blog, Paper Zen, to check what's new and to admire her dragonfly again and again...
Почетком прошлог мјесеца Сесилија ми је послала књигу међутим због бројних обавеза нисам успјела да је и сама прочитам.
One month ago Cecelia sent me her book “Pretty
Quilled Cards” and I was anxious to read it as soon as my busy schedule
allowed me to.
I was finally able to read it last week.
Сесилија је графички дизајнер и развила је посебан стил, њен квилинг је заиста специфичан и препознатљив.
Cecelia is a graphic designer and she
developed a quilling style that is truly unique, original and recognizable.
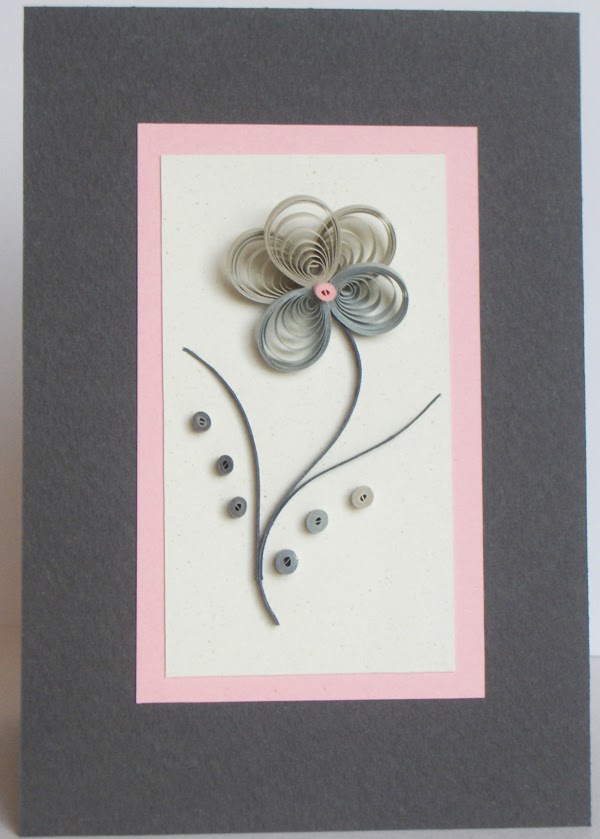
Прије неколико мјесеци, на свом Фејсбук профилу, Сесилија је поставила фотографију насловне стране њене
књиге. Одушевила сам се, наравно, њеним тршњиним цвијетом и питала се
како ли је урађена...Сесилија се
својски потрудила да све то и објасни а књига је, вјерујте, пуна лијепих
радова.
Few months ago Cecelia posted cover page of
her book on her Facebook page and I was amazed by the beautiful cherry tree
shown on it, wondering how she did it... I was thrilled to see that Cecelia
explained how to do it, along with many other beautiful examples you will find
in her book.
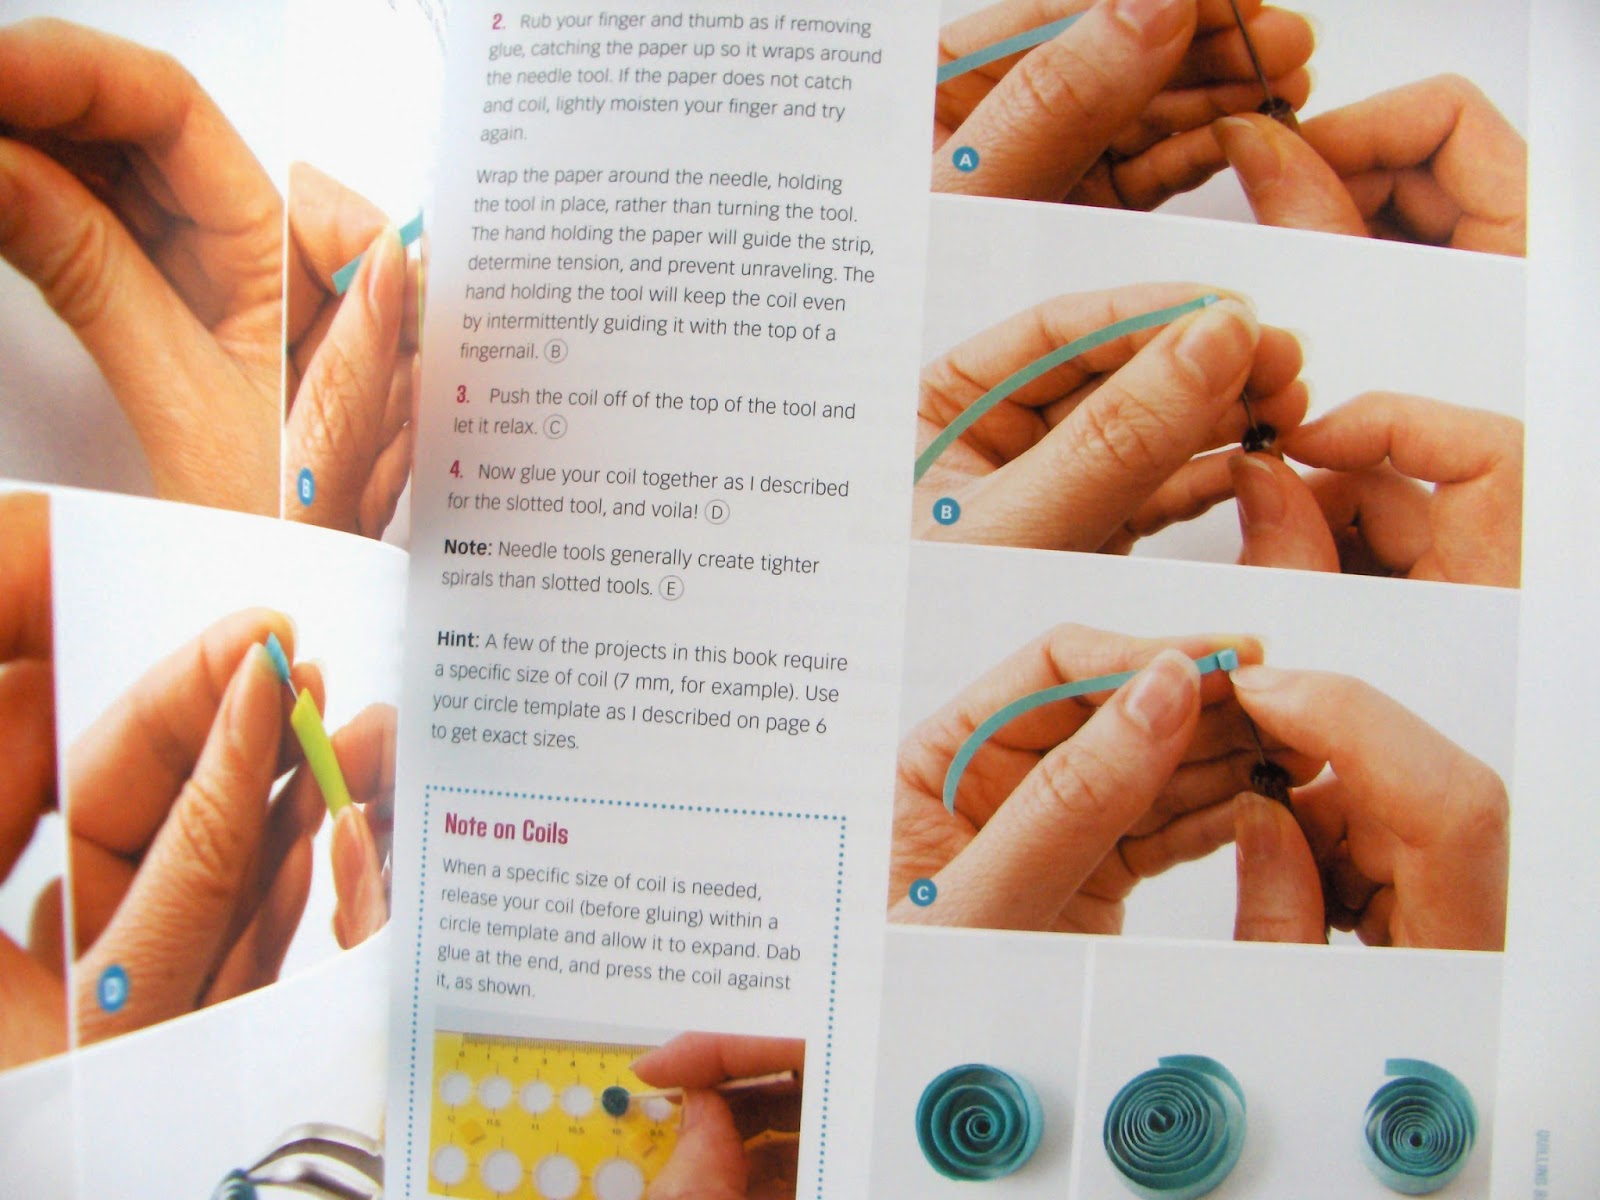 Примјери у књизи су јако добро објашњени, корак по корак.Фасцинирао
ме, прије свега, њен студиозан приступ изради. Све је лијепо
испланирано, до најситнијих детаља. Штета што нисам имала сличну књигу у
почетку мог бављења квилингом,
Примјери у књизи су јако добро објашњени, корак по корак.Фасцинирао
ме, прије свега, њен студиозан приступ изради. Све је лијепо
испланирано, до најситнијих детаља. Штета што нисам имала сличну књигу у
почетку мог бављења квилингом, сигурно би
Сесилијини многобројни савјети били итекако добродошли. Сви који желе, имају прилику да на лак и једноставан начин уђу у свијет квилинга.
The
examples in the book are very well explained in a step-by-step manner and I was
fascinated how everything is well planned. I wish I had this book when I first
started quilling, it would have helped me so much. It provides a fun and easy
way of learning the craft of qulling.

Сесилија пише разумљивим језиком, без компликовања, али уколико се не
сналазите најбоље са енгеским језиком, пратите бистре и јасне фотографије и неће бити
проблема. На самом почетку је листа материјала и алата који се користи у
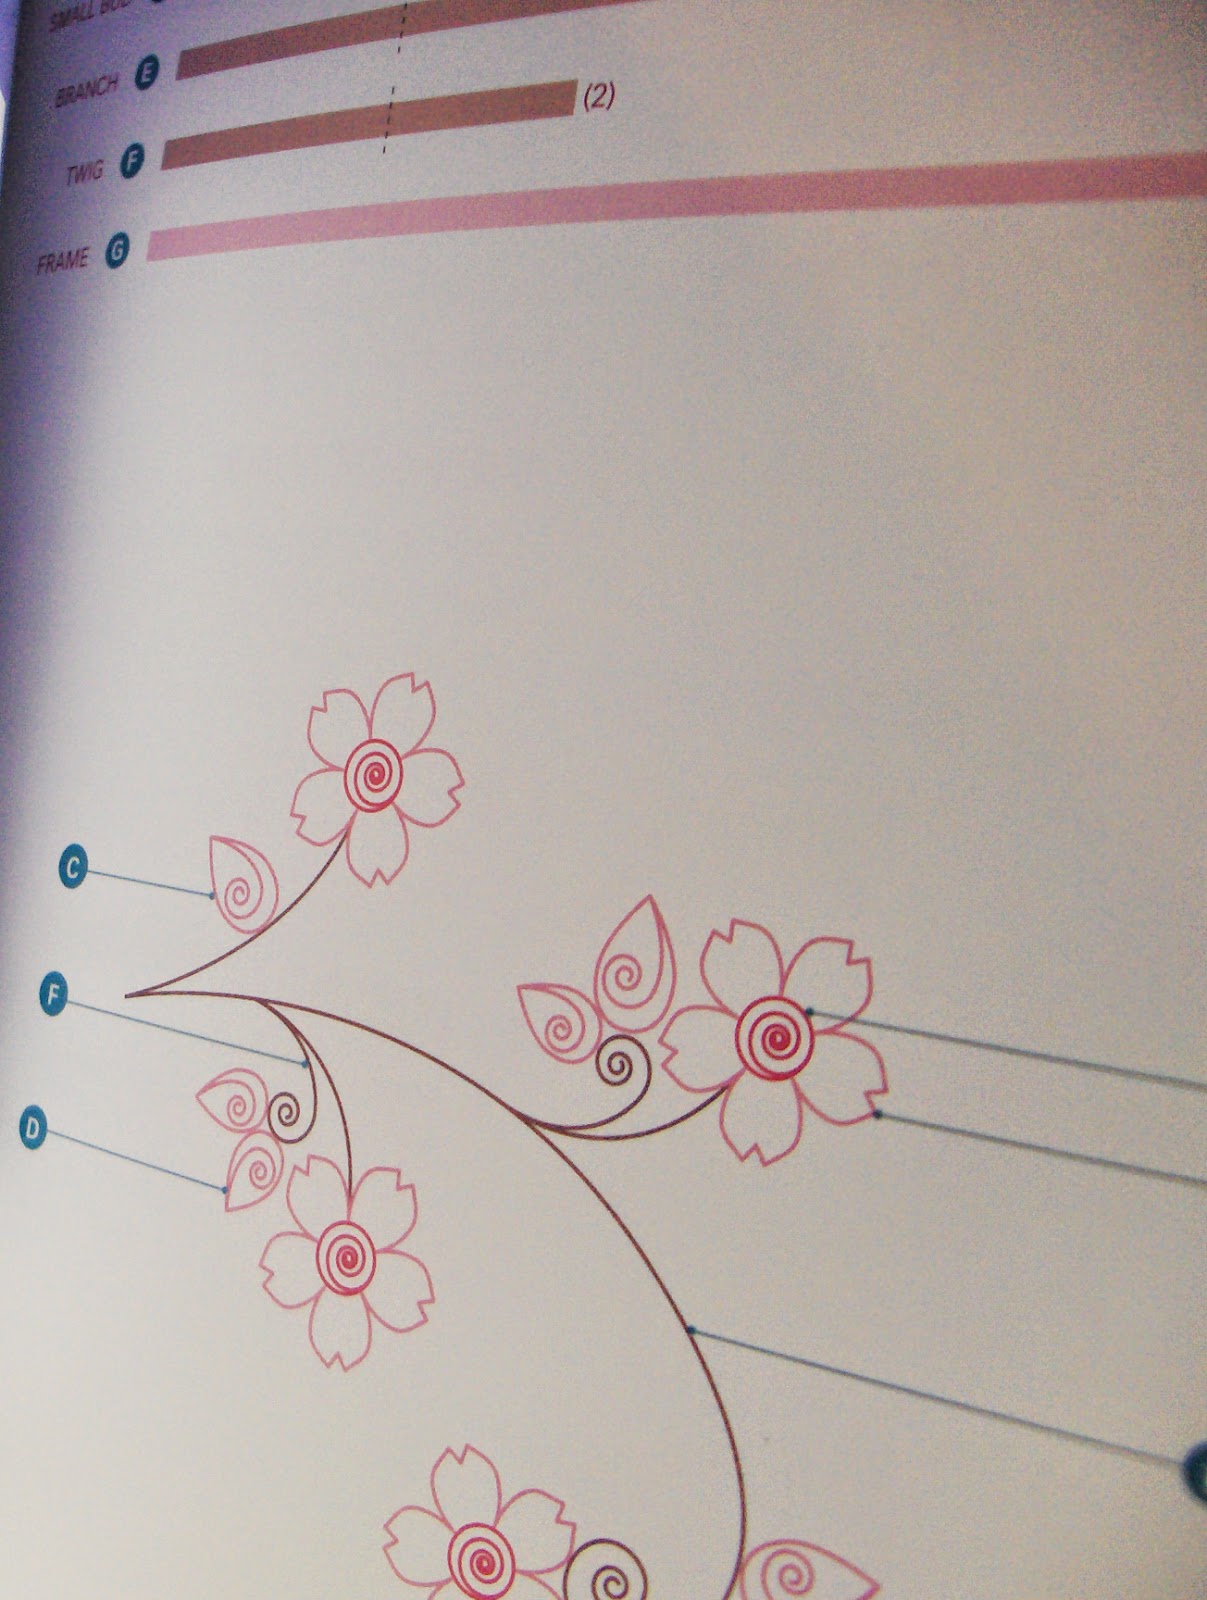
квилингу. Савјети како да избјегнете почетничке грешке и сл..Процес израде за сваку честитку је детаљно описан: боја, дужина тракице,
означена су мјеста гдје треба да се пресавије, изломи, залијепи тракица
која је употријебљена у пројекту, скице, спремне за фотокопирање које
би олакшале рад. Свака честитка има и посебну страницу са мотивом за
подлогу која може да се скенира и одштампа. ...Једноставно, Сесилија је мислила
на све!
Cecelia 's writing style is easy to follow
and understand, explanations are clear with plenty of photographs. You can find
the list of materials and tools used in the examples, colours and length
of strips, where you should bend the
paper, where to apply the glue, a lots of drawings ready to print... There are
even samples of backgrounds you could use for your work... she thought of
everything! Really fascinating.
Уколико желите да научите или побољшате своје квилинг умијеће, да то урадите на добро испланиран и забаван начин, Сесилијин метод ће вам бити од велике користи.
If you want to learn or improve your
quilling skills and to do it in organized and fun way, Cecelia 's method will be
of great help to you.
Књигу можете погледати и наручити овдје .
You can find her book here. Enjoy!