Недавно сам имала задовољство да упознам Босиљку и Ненада, дивне младе људе сада, искрено се надам, срећан брачни пар, и да им правим позвинице за вјенчање. Ово је фотографија 100-те ( било је много званица! ).
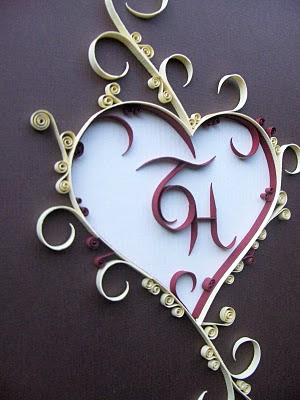
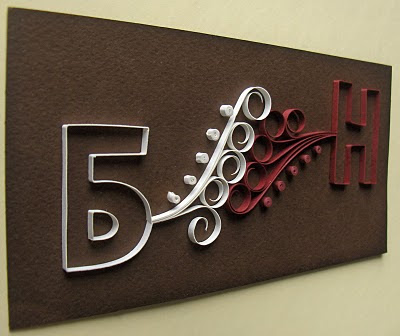
Recently, I had a pleasure to meet Bosiljka and Nenad, a wonderful young couple, now happily married. They asked me to make quilled invitations for their wedding ceremony. This is the photo of 100th invitation card ( they had a lot of guests! ). The letters are Cyrillic B and N for their first names.
 Мој највећи изазов до тада јер ми је ноприсиво тешко да направим двије исте честитке а камоли сто! Боје су сами одабрали а њихова жеља је била да иницијали стоје дијагонално и да на неки начин буду повезани. Оставили су ми сасвим довољно простора да убацим и неке своје идеје. Босиљка и Ненад су сами исписивали текст позивница тако да су праве мале рукотворине. Свако срце сам ручно сијекла , а идеја је била да се на подлози за текст позвиница, тачно на мјесту гдје је отвор срца, браон или бордо мастилом испише датум вјенчања.
It is a big challenge to make a large number of quilled wedding invitations because you can't make two identical ones. Bride and groom had already chosen the colors and also wanted to have their initials standing diagonally, connected in some way. This was just a basic idea that they had, leaving me a lot of space for my own design ideas. I decided to use the hart-shape cutout at the front of the invitation as the "window" where the date of the wedding would show up ( handwritten by bride and groom on the inside of the card ). It turned out really nice.
Ево како је свака позивница рађена, корак по корак:
And here is the way I did every single invitation, step by step:
Recently, I had a pleasure to meet Bosiljka and Nenad, a wonderful young couple, now happily married. They asked me to make quilled invitations for their wedding ceremony. This is the photo of 100th invitation card ( they had a lot of guests! ). The letters are Cyrillic B and N for their first names.

It is a big challenge to make a large number of quilled wedding invitations because you can't make two identical ones. Bride and groom had already chosen the colors and also wanted to have their initials standing diagonally, connected in some way. This was just a basic idea that they had, leaving me a lot of space for my own design ideas. I decided to use the hart-shape cutout at the front of the invitation as the "window" where the date of the wedding would show up ( handwritten by bride and groom on the inside of the card ). It turned out really nice.
Ево како је свака позивница рађена, корак по корак:
And here is the way I did every single invitation, step by step:
 |
| 1.Основа позивнице је 220g/m2, броан папир, развијена 170mmX165mm 1. Base of the card is 220g/m2, brow paper, developed 170mmX165mm |
 |
| 2. Подлога за текст за позивнице 75mmX155mm 2. Base for the text of the invitation 75mmX155mm |
 |
| 3. Три врсте папира 3. Three types of paper |
 |
| 4. Перфорирање 4. Perforating |
 |
| 5. Савијање 5.Folding |
 |
| 6. Пресавијана; шаблон 6. Folded; template |
 |
| 7. Обиљежавање 7. Marking |
 |
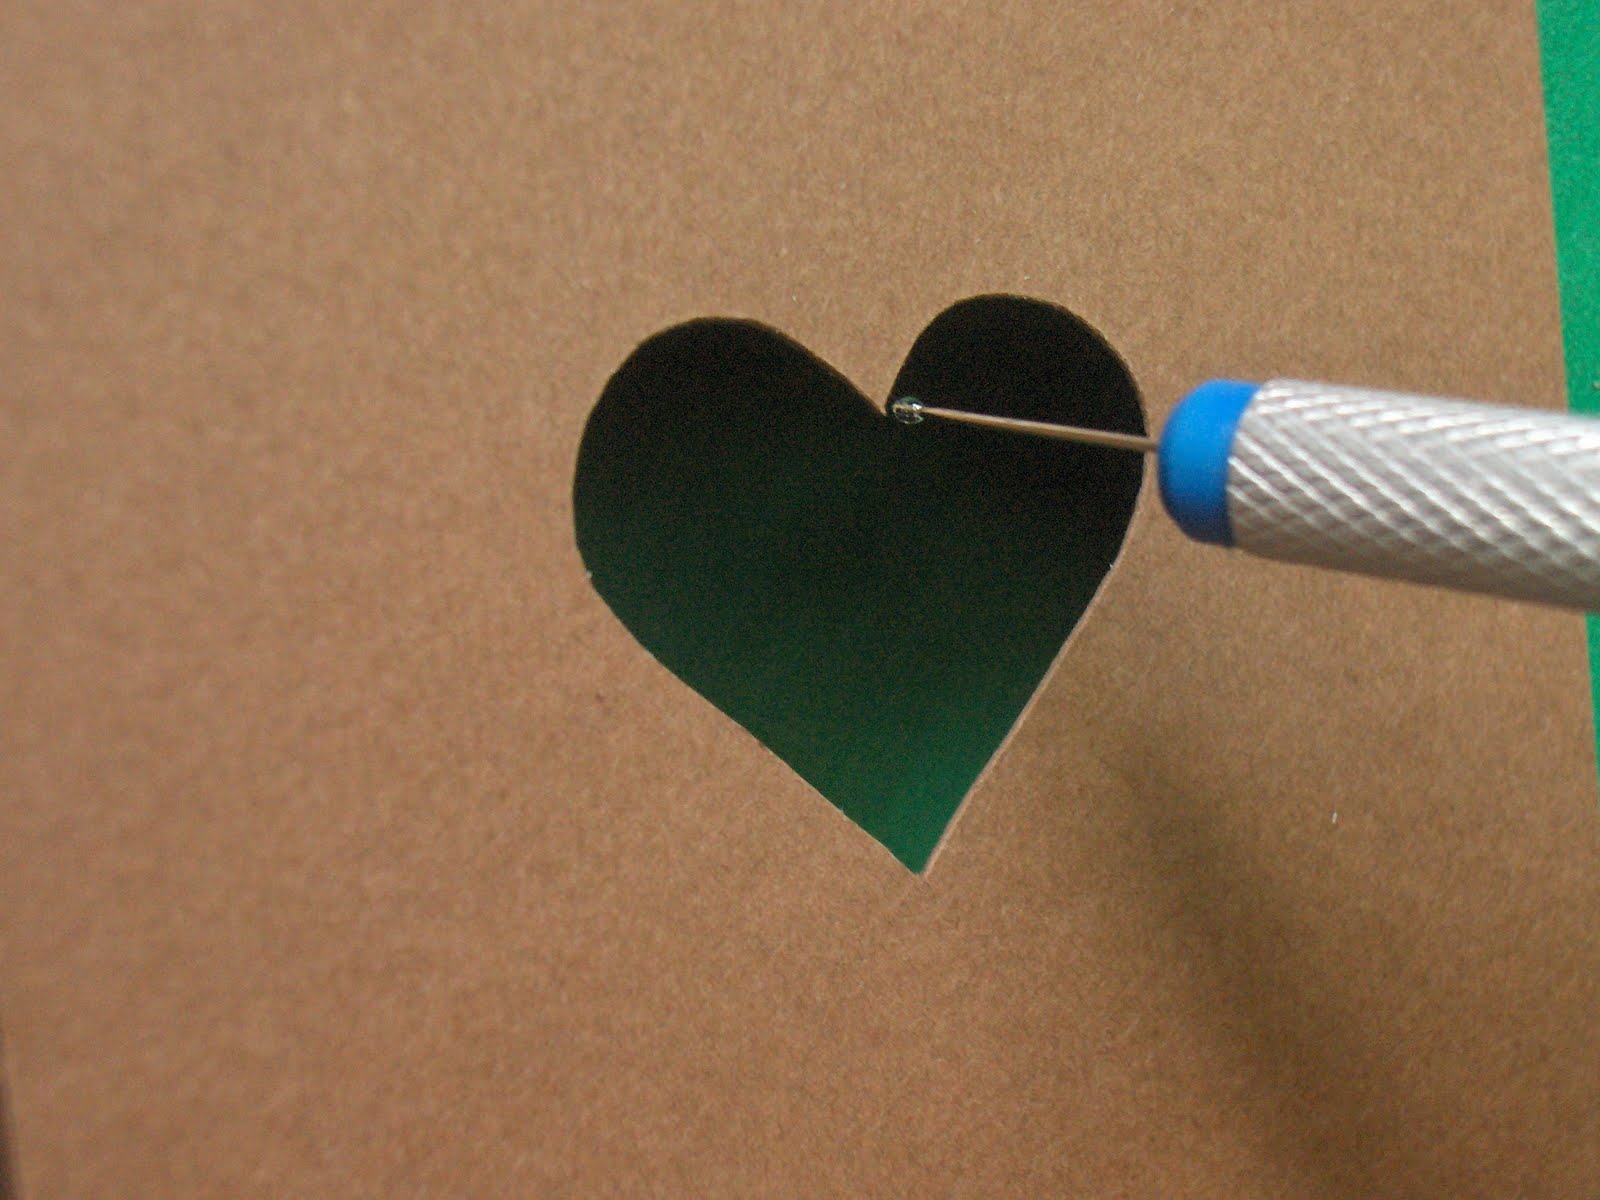
| 8. Исјецање срца 8. Cutting out |
 |
| 9. Тако 9. Done |
 |
| 10. Сјенчење 10. Shadowing |
 |
| 11. Наношење љепила 11. Glue |
 |
| 12. Одсјецање вишка 12. Cutting out extra paper |
 |
| 13. Исто и са друге стране 13. Same on the other side |
 |
| 14. Готово 14. Done |
 |
| 15. Мјерење 15. Measuring |
 |
| 16. Засјецање 16. Cutting |
 |
| 17. Спремно за обликовање слова 17. Ready for shaping initials |
 |
| 18. Прављење вијугуца, укупно 1200 комада 18. Rolling 1200 pieces |
 |
| 19. Мајушно 19. Tiny |
 |
| 20. Мањи облици су ~ 37mm , а већи ~ 74mm 20. Stripes for the smaller shapes are 37mm long and the bigger ones 74mm |
 |
| Спремне! Ready to go! |

 |
| Ово је била друга верзија позивнице. This was another version of the invitation |
7 comments:
Very cute! Thanks for your tutorial!
Thank you, WhiteRacoon!
Thanks for sharing your unique method. I like your work a lot.
This is amazing work, Suzana! How long did it take you to finish them all? I am very impressed, and will look forward to following your blog.
Thank you, Philippa! It took about a month, full time job :) At first it was really difficult but I got used to, both work and cards, and I missed them when they were finished.
I hope all of us will enjoy. Glad you're here.
Amazing work....
Karthika
http://coolcrafting.blogspot.com/
Thank you very much!!!
Suzana
Post a Comment